Thursday, September 25, 2014

Activity Baby Blankets

I went to a baby shower recently and decided to make some fun activity blankets for the two new little boys.
I used simple solid fleece for the background, and then added fun embellishments from my fabric stash.  Three fun toys completed the ensemble.  I did two different themes:

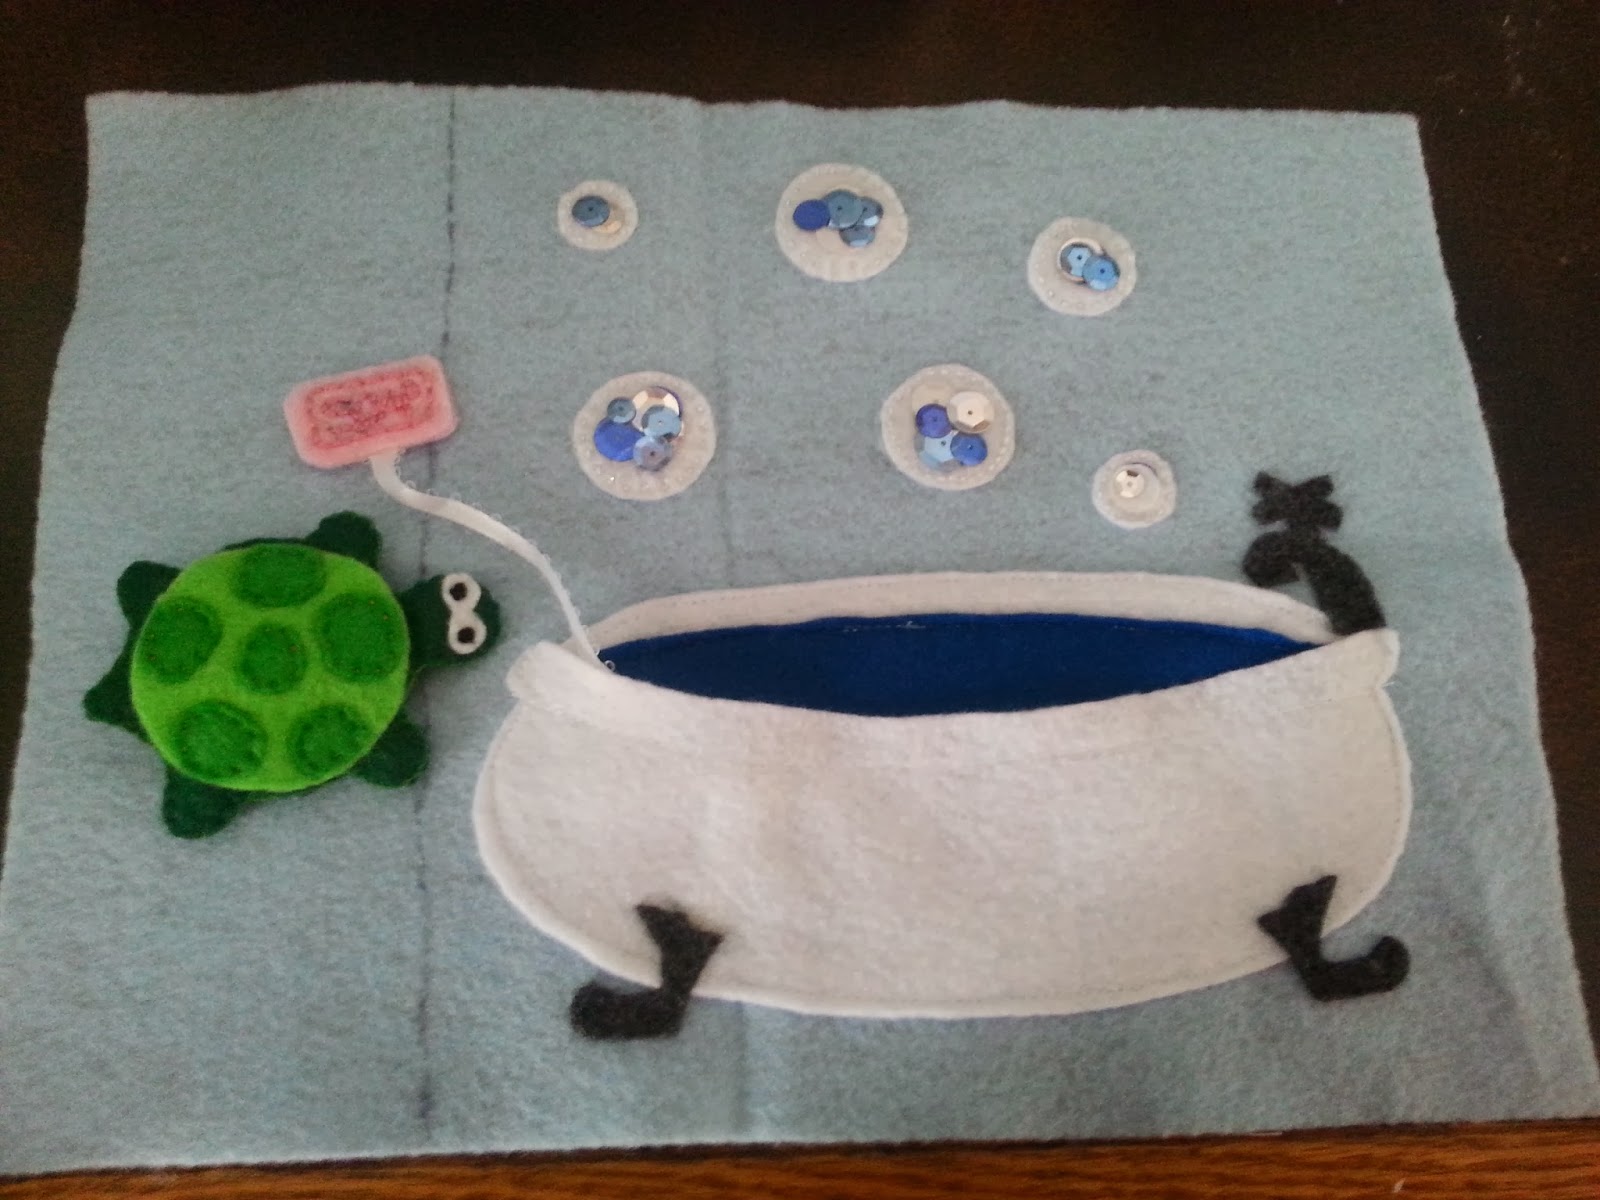
The sea theme blanket had a ribbon jellyfish sewn on, a treasure chest (with brown "leather" scraps and gold glitter felt), an oyster with a pearl (tan felt, pink and white satin scraps), a sewn on clownfish, and clear vinyl bubbles filled with sequins (I machine stitched around the vinyl twice to make sure it was very, very secure).  The toys are a fish with a jingle bell inside, a turtle with a squeaker inside, and a starfish with a shaker inside.  They can be removed with the rings to attach to a carseat or stroller.


Close up of fish and bubbles

The second blanket is space themed:

There is a ribbon shooting star sewn onto the page, silver glitter felt stars, plain yellow felt stars, and clear vinyl stars with sequins inside.  The toys are a spaceship with a squeaker inside, an astronaut with a jingle bell inside, and an alien with a shaker inside.  Again, they are obviously removable for more versatile use.


Close up of astronaut, glitter star, and vinyl star.  I used black glitter felt for the astronaut's face.


Close up of the spaceship.

This was a simple and easy baby gift to put together but it is REALLY useful and fun to play with.  The different textures, colors, and noises are perfect for a baby or young toddler.  Hopefully it has inspired you to make your own!


Monday, July 7, 2014

Everything is Awesome!

This is my project for today - my little brother's birthday cake.  He wanted Emmett which was a little intimidating until I found this tutorial for a frozen buttercream transfer.  It worked great!  The only thing I would do differently next time is the black gel stuff.  It didn't transfer at all and was sticky and weird to work with.  Next time I'm just going to make chocolate frosting and tint it black.  Otherwise though, it was an easy way to make a simple cake look pretty cool!


Friday, May 23, 2014

Tiger Cub Scout Puppets

My husband recently had to plan a Tiger Cub Scout evening of activities and after some searching he decided to do Tiger Elective 21, which says to make a puppet.  So this is what we came up with:
  
It's a Tiger Marionette!  Super fun to make, although just challenging enough for six and seven year olds.  My husband did say he had to tie all the knots for it.
Want to make one or an ambush of tigers?  Did you know a group of tigers is called an ambush (or a streak)?
Here's what you'll need for each tiger:
two toilet paper rolls (one for body, half of one for head)
orange and black duct tape
12mm wiggly eyes
orange and black pipe cleaners
glue dots
black yarn
craft sticks
(Helpful stuff for adult: hole punch, plastic cutting board, razor blade knife thing)

We got all our materials (that I didn't have on hand) at Hobby Lobby because I love that store and I had a gift card :)
For the adult to pre-prepare: drill holes in sporks and craft sticks & stick lengths of black duct tape to cutting board and slice diagonally to make stripes
1.  Cover the toilet paper rolls and spork handles in orange duct tape.
2.  Punch holes for legs, tale, and head string.
3.  Tie yarn to one front leg, thread it through the two leg holes on body and tie to other front leg.  Repeat for back legs.
4.  Twist an orange and black pipe cleaner together for tail.  Tie black yarn to tail hole on body and then attach tail to body (twist it around the hole).  Tie other end of yarn to one end of the craft stick.
5.  Tie yarn to head hole on body, thread yarn through two holes on head and tie to other end of craft stick.
6.  Attach eyes and pompom ears with glue dots.
7.  Decorate with stripes.
This is a pretty sturdy marionette (must be the duct tape :) and has held up to quite a bit of boy play and two-year-old brother manhandling :)
I think it could be easily altered to make Bear or Wolf puppets if that was the category of Cub Scout you need it for too!

We also had these craft stick people (which they did have enough time to use), paper bag puppet makings, and shadow puppet materials just in case they had extra time :)
This is my five-year-old's tiger (he went too, even though he's not officially a Cub Scout because his dad was leading :)


Thursday, May 22, 2014

Felt Garden Toy

I recently made a felt plantable garden toy for a friend's daughter.  I was inspired by A Beautiful Mind and Ikat Bag's amazingly beautiful creations.  I added the broccoli plant with removable broccoli florets (tutorial from Elemental Stitches).  I also made a bean plant similarly to the strawberry plant with green pipe cleaners.
And every garden needs a couple bunnies!  Mine came from Creativity in Pieces.


Broccoli plant - did you know this is how broccoli grows?


Plant with picked broccoli.  See the green velcro in the middle?  Each piece of broccoli has velcro on the bottom too.  Sewing the veins on the leaves was the most time consuming, boring part (even though I used my machine)


Bean plant and picked beans (they all have beads inside so they really feel like beans!)


Carrots (I used ribbon for the tops to be faster)


I loved making the flowers!


Top view of garden.  The "dirt" is actually pool noodle segments inside tubes of brown fleece.


And the bunnies :)

Monday, March 17, 2014

St Patrick's Day Trinity Treasure Hunt

Last night for our Awana Sparks club I put together a treasure hunt for each of the four teams to go on once they were finished reciting their verses.  Since we are celebrating St. Patrick's day I wanted to focus on shamrocks and the Trinity so all the clues are themed around that as well as memorizing Scripture.
It seemed like the kids REALLY liked it!  Since I had four teams of about ten kids each, plus Leaders, I wanted to make sure they weren't all going to the same places at the same time, so I made a very simple map with the path for each team to take.  It was ideal for a large group of kids.
The basic places can be customized for almost any location.  They were: rocks, kitchen, water (fountain), hiding spot, reception desk (or just a specifically placed person), and our club room.
Here are the printables for you to use with your Sunday School, Awana group, or family!  Pretty much anything can be used as prizes - I used St. Patrick's Day shamrock pencils, punching balloons, gold coins, and shamrock stickers from the dollar tree in individual bags for each child and tied with shamrock ribbon.


I also made this Trinity coloring page for kids to color while they were waiting to recite their verses.  I hope these help you in teaching your kids about the Trinity and celebrating St. Patrick's Day too!

Monday, March 10, 2014

I Had a Little Turtle Quiet Book Page

Here is another fun kid song that I thought would make a good quiet book page.  I REALLY loved putting this one together.

The turtle is a finger puppet in the bathtub pocket.  The soap is attached with a ribbon so it won't get lost.  And there are sequins in the bubbles.  So much fun!

  
I started by arranging all the pieces on the page so I could make sure it all lined up correctly.  Then I stitched a line on the bathtub front piece only to distinguish the tub lip and keep it from stretching too much with play.  I stitched down the tub back and the water piece.  Then you want to make the soap.  I just used pink embroidery floss to stitch the word "soap" and a dashed outline around the front piece and then hot glued the front and back together sandwiching a piece of ribbon between.  Tuck the ribbon under the bottom of the tub and stitch the tub front onto the page.  Don't worry if some ribbon sticks out of the bottom - you can cut it off pretty closely after it's stitched and the tub foot should cover the rest.  I just hot glued on the tub feet and spout.  The bubbles are white backgrounds with sequins sandwiched between vinyl.  I hand stitched around the vinyl with tiny tiny stitches to attach it.


This is the back of the turtle so you can see how I did the puppet part.  Basically, I did the turtle front first and stitched on the green shell and round shell decorations.  I also stitched on little white round eyes with a black french knot in the middle.  Then I put the turtle front and back together and cut the third turtle piece right above and below the legs to create a tunnel for a finger.  Hopefully the picture above helps clarify!  I stitched around the outline of the turtle with a blanket stitch.
This page is pretty simple, and only took me about an hour to complete.  Great naptime project!
As always, if you make it, I would LOVE to see your version.

Saturday, March 8, 2014

A Peanut Sat on a Railroad Track Quiet Book Page


Have you ever heard this kid's song?  It was on the "Wee Sing Silly Songs" cassette tape I used to listen to as a kid.  Except in our version it was "down the line came number nine" which rather works better for a quiet page.
I used the train ornament pattern from Imagine Our Life.  I just left two holes on each end to run the ribbon through so the train stays on the track.  The track rails are very simple: two pieces of thin brown ribbon sewn to each diagonal end of the page.  The track pieces are dark brown (or gray) rectangles that I hot glued on evenly spaced down the diagonal.  I also stitched on a green pocket the same color as the page.

For the peanut, I stitched random black lines to give the look of a shell on the front, plus an "o" shaped mouth and two little white circles attached with black french knots.  Then I stitched the front and back together with a blanket stitch.  I did the same blanket stitch around the front and back of the peanut butter.


Thursday, March 6, 2014

5 Little Monkeys Two Page Spread

I made the Five Little Monkeys Jumping on the Bed Page from Imagine Our Life for my nephew, but he mixes up the song with the Five Little Monkeys Swinging in a Tree so I designed the accompanying page to go along with the monkeys.  I love that the alligator can "snap" the monkeys :)
I didn't draw up the patterns for this yet, but comment and let me know if you would like one and I'll try to get it to you asap.

 
I changed the "mommy called the doctor" to "daddy called the doctor", so daddy monkey is in a Batman shirt and camo shorts.
 
The alligator's teeth are actually diamond shaped that I machine showed on as pictured.  Then I used hot glue to attach the two sides to make them stiffer.  Worked great!

I also hot glued on his googly eyes.  I LOVE how he turned out!

All ready to snap monkeys!


Tuesday, March 4, 2014

Dinosaur Travel Playset

I LOVED LOVED LOVED the dinosaur playmat that Fun at Home with Kids made.  I made one just like it for our big dinosaurs, but I wanted a smaller version for traveling or church.  So far I have made two of these travel sized playsets.  The first was in one of those tins that you get cookies in at Christmas.  That was for my second cousin.  Then I wanted to make one for my nephew, but the traveling he does is mostly flying and I figured the TSA would have a FIT with a metal container :p  So I got one of those pencil cases for 97 cents at Target.  It was a little smaller but it worked great!
I got the dinosaurs from Amazon but one of those Safari toobs of dinosaurs will work too.
I don't have any patterns or anything - I basically just made it up as I went along.  I used the same basic ideas as Fun at Home with Kids though.  LOTS of hot glue :)  But it was totally worth it and it really holds up well to little boy play!


Here it is by itself


Here is with about ten dinosaurs (I will use the rest for gifts & prize box awards)

Here is a different angle and action shot as my son is closing the lid!


And this is closed.  I covered the box in a sheet of duct tape so you couldn't see the hot glue through the clear plastic.